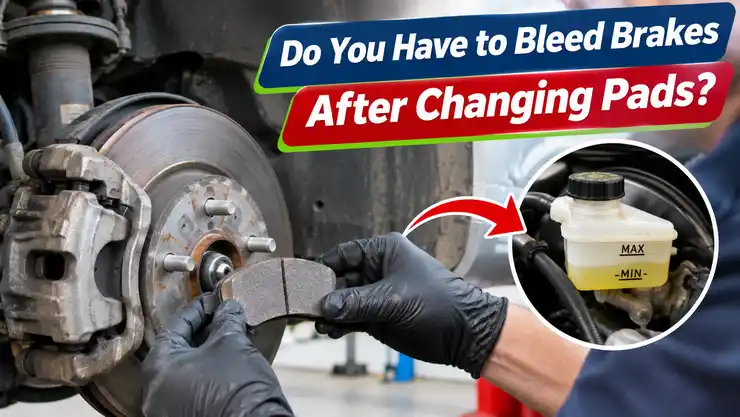
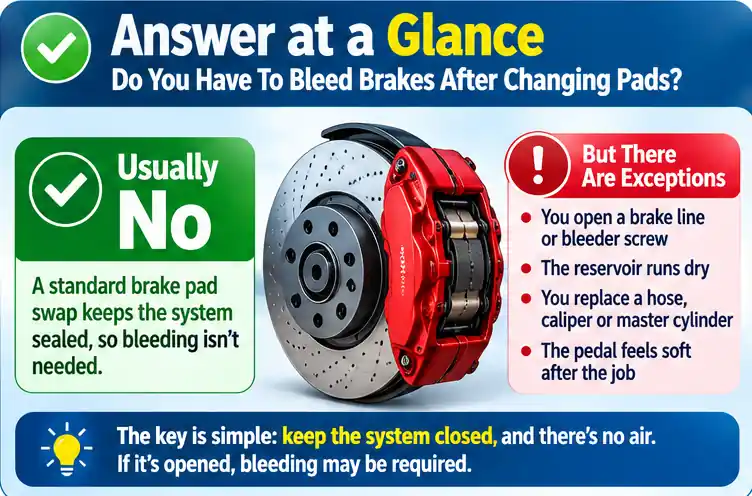
In most cases, no. A standard brake pad swap does not require bleeding, because the hydraulic system stays closed the whole time.
But that short answer hides a few details that matter. One wrong move, such as opening a bleeder screw or letting the reservoir run dry, can bring air into the lines and turn an easy job into a safety problem.
There is also a second question tucked inside the first. Even if bleeding is not needed, the old fluid in your system may be overdue for a change, and a pad job is a handy time to deal with it.
Here is a clear guide to when you can skip the bleed, when you must do it, how brake fluid ages, and how to push the piston back the right way. You will also find a step list for a clean pad swap, a bedding-in routine, and the mistakes that cause soft pedals after a pad change.
The Straight Answer: When Bleeding Is Not Needed
Why A Pad Swap Keeps The System Sealed
Your brakes work through fluid that cannot be compressed. When you press the pedal, the master cylinder pushes fluid through steel lines and rubber hoses to the calipers, and the caliper piston clamps the pads against the rotor.
Changing pads does not touch any of those fluid passages. You remove the caliper bolts, slide out the worn pads, and fit new ones. No line gets disconnected, and no bleeder screw gets opened.
Because nothing is opened, air has no way in. Air is the reason brakes get bled in the first place, so with no air entry, there is nothing to remove.
That is why most mechanics and technical guides say a straightforward pad change does not call for bleeding.
What Happens To The Fluid When You Push The Piston Back
New pads are thicker than worn ones, so the caliper piston has to be pushed back into its bore to make room. As it goes in, it forces a small amount of fluid back up the line toward the master cylinder.
That is normal. The reservoir level rises a little, and the fluid simply returns to where it came from.
If you did not top up the reservoir to the brim, nothing spills. If it was already full, watch it as you work, and remove a little with a clean syringe if it nears the edge.
The fluid also moves back through the ABS unit in some cars. If the old fluid is dirty, that is where a small risk shows up, and it leads to the next point.
| Action During Pad Change | Does It Need A Bleed? |
| Remove caliper, swap pads, push piston back | No |
| Reservoir stays above the minimum mark | No |
| Bleeder screw never opened | No |
| Brake line or hose disconnected | Yes |
| Reservoir ran dry | Yes |
| Pedal feels soft afterward | Yes |
When Bleeding Is Necessary
Clear Triggers That Mean Air May Be In The Lines
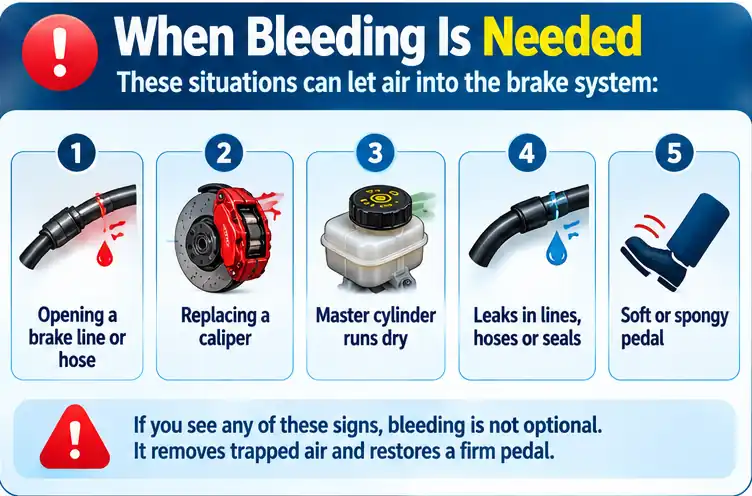
Some situations break the closed system, and then bleeding is not optional. Opening a brake line, replacing a hose, or swapping a caliper all let air in.
A master cylinder that ran out of fluid is another one. Air gets pulled in at the reservoir, and it can travel down several lines.
Any leak that lets fluid escape also lets air creep in. If you find damp spots around a caliper or hose, fix the leak and bleed the affected circuit.
A soft or spongy pedal is the warning sign. If the pedal sinks further than usual or feels mushy after the job, air is likely present.
Why Cracking The Bleeder Screw Changes The Rules
Some DIY guides suggest opening the bleeder screw while you push the piston back. The idea is to send old, dirty fluid out the screw instead of back toward the ABS unit.
The logic is fair, but the cost is high. The moment you open that screw, you break the seal, and air can be drawn back in when the screw is closed.
If you choose this method, you have to treat it as a bleed. That means topping up the reservoir, closing the screw properly, and bleeding the caliper afterward.
For most owners, the cleaner path is simple. Keep the screw closed during a pad change, and handle fluid replacement as a separate job.
When The Pedal Feels Wrong After New Pads
A new pad set can feel a little different at first. The pedal may sit slightly higher or need a few pumps to firm up, since the pistons have to move back out to the pads.
That should settle after two or three presses. If the pedal still feels soft, sinks slowly, or needs pumping to work, do not drive the car.
Check the reservoir level first. Then look for leaks at the calipers, hoses, and the master cylinder.
If the level is fine and nothing leaks, air in the system is the likely cause, and a proper bleed is the answer.
The Fluid Question: A Good Moment To Refresh
How Brake Fluid Ages Inside The System
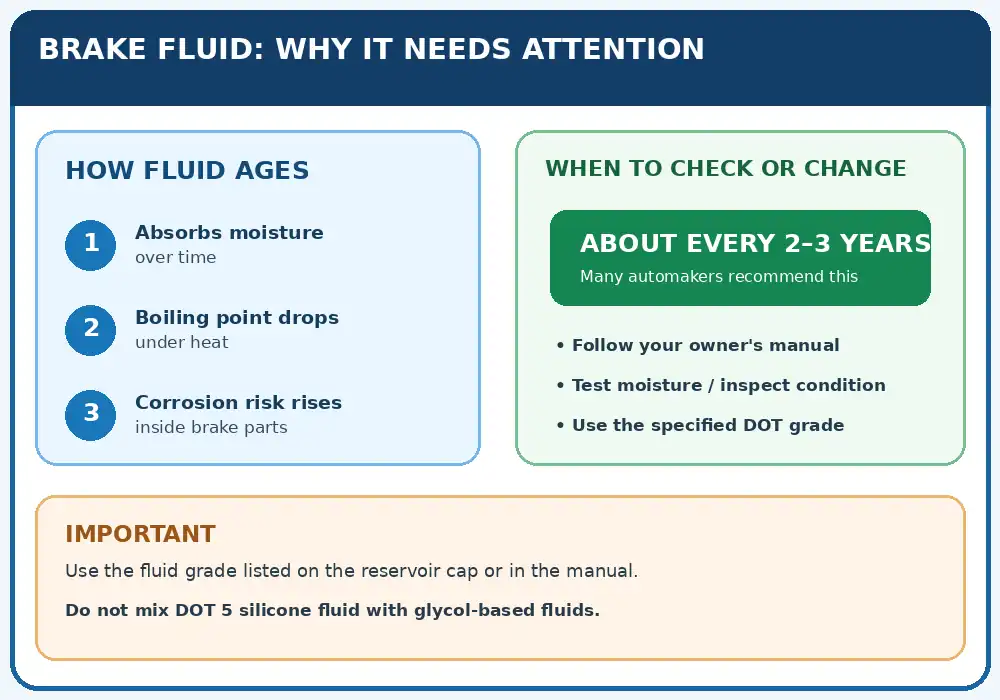
Most brake fluid is hygroscopic, which means it absorbs moisture from the air over time. Even a sealed system slowly picks up water through hoses and seals.
Water lowers the boiling point. Under heavy braking, such as a long downhill, heat can turn that water into vapor, and vapor compresses, so the pedal goes soft.
Water also feeds corrosion inside calipers, lines, and the ABS unit. Over several years, that can lead to sticking pistons and costly parts.
That is why the fluid has its own schedule, separate from pads. Many automakers call for a change every two to three years, and your owner’s manual gives the exact interval.
Testing And Replacement Intervals
Brake fluid grades such as DOT 3, DOT 4, and DOT 5.1 have minimum boiling points when new and when wet. The gap between the two is what matters.
A cheap test strip or electronic tester can estimate water content in seconds. Many shops use them, and so do careful owners.
If the fluid looks dark, murky, or has debris, change it. If it is clear to light amber and under its age limit, it may be fine.
A pad change can sit right in the middle of a fluid interval. That is where the choice comes in: bleed because the fluid is due, not because the pads were changed.
| Fluid Grade | Dry Boiling Point (Min) | Wet Boiling Point (Min) |
| DOT 3 | 401°F (205°C) | 284°F (140°C) |
| DOT 4 | 446°F (230°C) | 311°F (155°C) |
Always use the grade stated on the reservoir cap or in your manual. Do not mix DOT 5 silicone fluid with glycol-based fluids.
How To Do The Pad Swap Without Needing A Bleed
Preparation And Piston Retraction
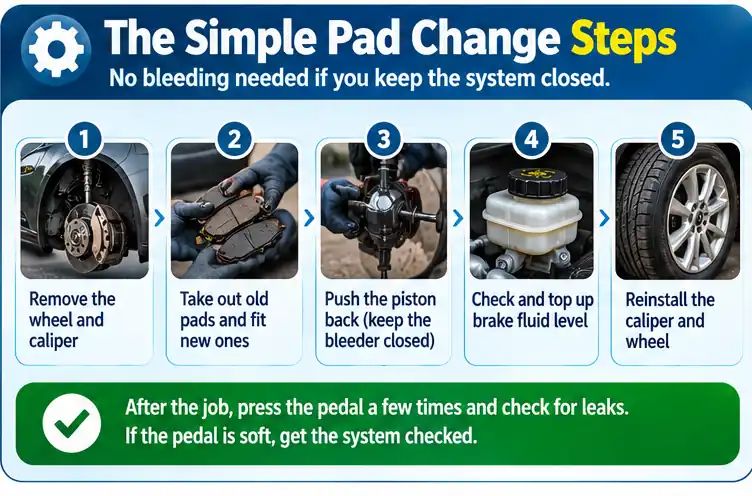
Start with the car safely on jack stands, wheel off, and the reservoir cap in view. Check the fluid level and look at the color before you start.
Then work through these steps:
- Remove the caliper bolts and hang the caliper on a hook so it does not strain the hose.
- Take out the old pads and clips, and clean the bracket.
- Open the reservoir cap loosely, or remove a small amount of fluid if the level is high.
- Push the piston back slowly with a C-clamp or a piston tool, using the old pad as a buffer.
- Fit the new pads and hardware, apply brake grease only where the manual allows, and reinstall the caliper.
Go slowly on step four. Forcing the piston fast can push dirt or debris back and stress the seals.
Models With Electronic Parking Brakes
Many newer cars use an electronic parking brake on the rear calipers. Those pistons cannot simply be pushed back by hand, and some have to be wound in with a tool.
In many cases, the car must be put into a service mode with a scan tool or button sequence. Skipping this can damage the motor and gears inside the caliper.
Rear calipers on some cars also have a screw-in piston, so a twist-and-press tool is needed, not a clamp.
Before you start, check the service manual for your model. If the steps look unclear, a shop can do the rear pads for a modest labor charge.
Final Checks And Bedding In
Before you move the car, press the brake pedal several times until it firms up. You should feel a solid pedal before the wheels turn.
Recheck the reservoir level and top up to the max line if needed. Wipe any spills right away, because brake fluid strips paint.
New pads need a bedding-in routine. Follow the pad maker’s instructions, which usually call for a series of moderate stops from medium speed, with cooling time between them.
Avoid hard stops for the first few hundred miles. Listen for grinding, and watch for any pulling or vibration.
Mistakes And Safety Rules
Common Errors That Cause Soft Pedals
The top mistake is letting the reservoir run dry. That can happen if you pump the pedal with the pistons out of the calipers, or if you remove fluid and forget to top it up.
Another slip is pressing the pedal with the caliper off. The piston can pop out of its bore, and then the seal is damaged and a bleed or a new caliper is required.
Some owners reuse old crush washers, skip hose checks, or forget to tighten the caliper bolts to the correct torque.
Overfilling the reservoir with new pads installed is also common. As the pads wear, the level drops, so start at the right mark rather than the top.
When To Hand The Job To A Professional
If a caliper piston is seized, a hose is cracked, or the pedal stays soft after a careful pad change, stop. These are not DIY guess jobs.
Safety matters more than savings. A shop can pressure-bleed the system, cycle the ABS pump with a scan tool, and test the fluid.
Also go to a pro if the car has a complex brake-by-wire setup, an electric parking brake you cannot service, or a warning light that will not clear.
When you are unsure, a short inspection costs far less than a failed brake on the road.
Questions people ask most often:
Do I have to bleed brakes after changing pads?
No, not if you only swapped the pads and never opened a brake line or bleeder screw. The hydraulic system stays sealed, so air has no way in. If the pedal feels soft afterward, bleed the system.
What happens if I do not bleed after changing pads?
If the system stayed sealed, nothing happens. The pedal should feel firm after a few presses. If air did get in, you may notice a spongy pedal or longer stopping distance, which means a bleed is needed.
Should I bleed the brakes anyway when I change the pads?
It is a good idea if the fluid is old, dark, or past the interval in your manual. Many owners pair the two jobs. It is not required for the pads, but it is smart maintenance.
Why is my brake pedal soft after replacing pads?
After new pads, the pedal may need a few presses to firm up. If it stays soft, check the fluid level and look for leaks. Air in the lines is another cause and calls for a bleed.
Can I push the caliper piston back without opening the bleeder?
Yes, and it is the standard method. Push it back slowly with a clamp or tool, and keep an eye on the reservoir. Opening the bleeder screw turns the job into a bleed and brings air risk.
How often should brake fluid be changed?
Many automakers recommend every two to three years, no matter how many miles you drive. Check your owner’s manual, and use a tester or visual check to spot water or dirt earlier.