Brake fluid never gets the attention that oil or tires receive, yet it does something neither of those parts can do. It transfers the force from your foot straight to the calipers, instantly, every single time you press the pedal.
Most owners never open that little reservoir cap until something feels wrong. By then, the fluid inside has often turned dark, thick, and far less effective than the day it left the factory.
Water sneaks into brake lines slowly, through hoses, seals, and tiny pores in rubber components, whether the car sits in a garage or drives daily. That moisture lowers the boiling point of the fluid, and a lower boiling point means weaker brakes exactly when you need them most.
This guide breaks down real intervals, warning signs, and a clear walkthrough for handling the job yourself, or knowing exactly what a shop should be doing when you pay for it.
Why Brake Fluid Breaks Down Over Time
Brake fluid is not like engine oil sitting in a sealed pan. It sits inside a system exposed to heat, pressure, and constant contact with rubber seals that slowly let moisture creep in.
Most fluid types used in passenger cars, including DOT 3, DOT 4, and DOT 5.1, are glycol-based, meaning they naturally attract water from the surrounding air. That trait is called hygroscopic behavior, and it happens whether the car is parked or driven daily.
How Moisture Ruins Brake Fluid
Water content inside brake fluid rises gradually, often reaching two or three percent within a couple of years of normal driving. That percentage sounds small, but it drops the fluid’s boiling point dramatically compared to fresh fluid straight from the bottle.
Under hard braking, especially down long hills or during repeated stops in traffic, fluid temperature spikes fast near the calipers. Contaminated fluid can boil under that heat, creating gas bubbles inside the lines, and gas compresses unlike liquid. That compression is exactly why a brake pedal suddenly feels soft, spongy, or sinks closer to the floor than usual.
Heat And Chemical Wear Inside The System
Beyond moisture, brake fluid also absorbs tiny metal particles as calipers, pistons, and lines wear down over years of use. Those particles darken the fluid and slowly turn it acidic instead of neutral.
Acidic fluid corrodes internal components from the inside, including the master cylinder, ABS module, and caliper pistons. Repair bills for these parts run far higher than a routine fluid flush, which is one reason technicians treat old fluid as a serious long-term risk rather than a cosmetic issue.
How Often You Should Change Brake Fluid
Every automaker sets its own recommended interval, published inside the owner’s manual or maintenance booklet that came with the vehicle. Ignoring that number is one of the most common maintenance mistakes drivers make.
Across most brands, brake fluid replacement falls somewhere between two and three years, or roughly 30,000 to 45,000 miles, whichever milestone arrives first. Some newer vehicles stretch this slightly further using improved seals and fluid formulations.
Manufacturer Guidelines Versus Real World Driving
A manual’s number assumes fairly normal driving conditions, moderate climate, and typical stop-and-go traffic patterns. Real-world habits often push fluid degradation faster than that baseline assumption.
Frequent mountain driving, towing, track days, or stop-heavy city commutes generate far more heat inside the braking system than a quiet suburban commute. Drivers who regularly cross water, mud, or unpaved roads also introduce moisture faster, shortening the practical interval even if the manual still lists the standard recommendation.
Mileage Based Vs Time Based Intervals
Mileage and time intervals rarely align perfectly, especially for vehicles driven only a few thousand miles per year. Time-based degradation happens regardless of how far the car actually travels.
| Vehicle Usage Pattern | Suggested Brake Fluid Interval |
| Average daily commuter | Every 2 years or 30,000 miles |
| Frequent mountain or towing use | Every 1 to 2 years |
| Low-mileage, garage-kept car | Every 2 to 3 years, time-based |
| Track use or aggressive driving | Every 6 to 12 months |
| Off-road or wet-climate driving | Annually, plus fluid testing |
Whichever milestone hits first, mileage or years, should trigger the flush. Waiting for both numbers to line up perfectly leaves fluid degrading quietly in the background.
Signs Your Brake Fluid Needs Replacing
Manuals give a starting baseline, but the fluid itself often tells its own story long before a scheduled interval arrives. A simple visual check takes less than two minutes.
Brake fluid test strips, sold cheaply at most auto parts stores, measure copper content and moisture percentage directly. These strips give a far more precise answer than guessing based on color alone.
Visual Clues In The Reservoir
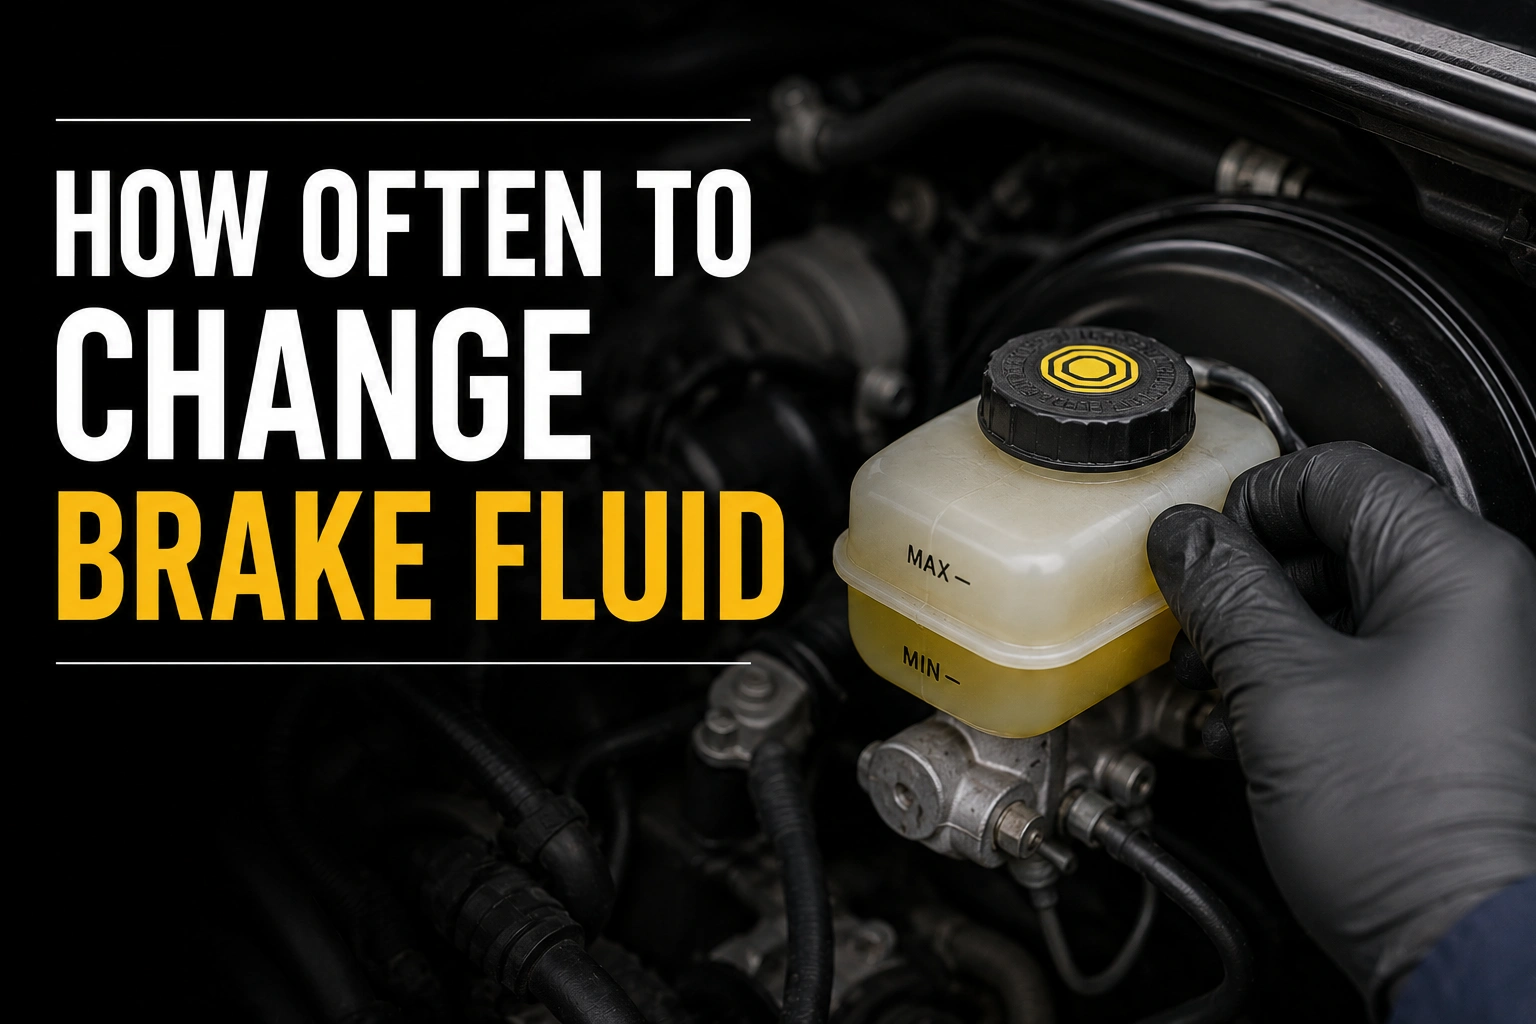
Fresh brake fluid looks light amber, almost like cooking oil, and stays fairly transparent when held up to light. As contamination builds, that color shifts toward brown, and eventually turns nearly black in badly neglected systems.
Locate the reservoir near the firewall on the driver’s side of the engine bay, marked with minimum and maximum fill lines. If fluid looks murky, sits below the minimum line, or contains visible particles floating inside, that reservoir is overdue for a flush regardless of mileage.
Warning Signs While Driving
A spongy or soft brake pedal, one that sinks closer to the floor than it used to, often signals moisture-related boiling somewhere in the system. This symptom tends to worsen after extended braking, like descending a long grade.
Longer stopping distances, a pedal that requires extra pressure, or a burning smell after repeated hard stops all point toward fluid problems rather than pad wear alone. An illuminated ABS warning light can also indicate fluid issues, since low or contaminated fluid affects sensor readings inside the anti-lock system.
Step By Step Guide To Changing Brake Fluid
Replacing brake fluid at home is genuinely one of the more approachable DIY jobs, provided the right tools are on hand beforehand. Rushing without preparation is where most mistakes happen.
The entire process usually takes under an hour for someone working alone, or roughly thirty minutes with a second person helping from inside the car.
Tools And Fluid Type You Will Need
Confirm the exact fluid type specified in the owner’s manual before buying anything, since mixing incompatible types can damage seals. Most vehicles call for DOT 3 or DOT 4, while a smaller number of models require DOT 5.1.
| Item Needed | Purpose |
| Correct DOT-rated brake fluid | Matches manufacturer specification |
| Wrench or brake bleeder valve tool | Opens bleeder screws at each wheel |
| Clear tubing and catch container | Captures old fluid safely |
| Turkey baster or fluid extractor | Removes old fluid from reservoir |
| Shop rags | Cleans spills, since fluid damages paint |
Never let brake fluid touch painted surfaces during this process, since most types strip paint on contact within seconds. Keep rags nearby at every step just in case.
The Bleeding Process Explained
Start by removing as much old fluid as possible from the reservoir using a turkey baster or dedicated extractor tool. Refill immediately with fresh fluid to prevent air from entering the master cylinder.
Working one wheel at a time, typically farthest from the master cylinder first, attach tubing to the bleeder screw and submerge the other end in a catch container filled partway with fluid. Have a helper pump the brake pedal, hold it down, then open the bleeder screw briefly to release fluid and air together before closing it again. Repeat this sequence at each wheel until fluid runs clear and free of bubbles, checking the reservoir level frequently throughout to avoid running it dry.
Cost And Professional Versus DIY Considerations
Shops typically charge a flat labor rate plus fluid cost for a full brake fluid flush, and pricing varies based on region and vehicle type. Luxury or performance vehicles with larger fluid capacities usually cost more.
| Service Option | Typical Price Range | Time Required |
| DIY with basic tools | $15 to $40 in fluid cost | 45 to 90 minutes |
| Independent mechanic | $75 to $120 | 30 to 45 minutes |
| Dealership service | $100 to $180 | 30 to 60 minutes |
| Pressure or vacuum bleeder machine service | $90 to $150 | 20 to 30 minutes |
Shops with pressure bleeding machines complete the job faster and often more thoroughly than manual pumping, since consistent pressure pushes contaminated fluid out more completely. Bundling this service with a brake pad replacement or rotor job frequently saves money, since the system is already open for other work.
When To Choose Professional Service Instead
Vehicles with electronic parking brakes, complex ABS modules, or hybrid regenerative braking systems sometimes require specific bleeding sequences that need dealer-level scan tools. Attempting these without proper equipment risks trapping air inside the system.
Anyone unfamiliar with brake systems, uncomfortable working under a car, or lacking basic tools should default to a trusted shop rather than risking a botched bleed. A poorly bled brake system creates real safety risk, so cost savings from a DIY attempt rarely justify the danger for an inexperienced first-timer.
Frequently Asked Questions
How often should brake fluid actually be changed?
Most manufacturers recommend replacing brake fluid every two to three years, or between 30,000 and 45,000 miles, whichever comes first. Checking the owner’s manual gives the exact figure for a specific vehicle.
Can old brake fluid actually cause brake failure?
Yes. Moisture-contaminated fluid can boil under heavy braking, creating air bubbles that compress instead of transferring force, which leads to a soft pedal and longer stopping distances. Severely neglected fluid can also corrode internal components over time.
What color should healthy brake fluid be?
Fresh fluid appears light amber and mostly transparent. Dark brown or black fluid signals contamination and should prompt a flush regardless of the vehicle’s current mileage.
Is it safe to mix different brake fluid types?
No. Mixing DOT 3, DOT 4, and DOT 5 fluids can damage seals and reduce braking performance, since they use different chemical bases. Always match the type listed in the owner’s manual.
Can brake fluid be changed without a mechanic?
Yes, with basic tools like a wrench, clear tubing, a catch container, and a helper to pump the pedal. Vehicles with electronic parking brakes or complex ABS systems may still require professional equipment for a proper bleed.
Does a brake fluid flush affect brake pads or rotors?
No, changing brake fluid does not wear down pads or rotors, since it only affects the hydraulic system carrying pressure to the calipers. Pad and rotor wear depends entirely on separate factors like driving style and mileage.